Showing posts with label Gadgets. Show all posts

Wednesday, March 1, 2017

The New Followers Gadget - Blocking Followers

With the pre 2016 Followers gadget, the Followers population for a blog was managed through an Options link on the Followers gadget.

This required the blog owner to sign into the Followers gadget, to access the Options link. Authentication - and an owner specific Options menu - is no longer a pert of the Followers gadget.

It is possible to Block Followers, from a blog - the option is just not part of the Followers gadget, any more.

Previously, the option to Block a Follower was part of the Options menu, in the Followers gadget.

To ensure that only a blog administrator was able to Block a Follower - or do various other blog to viewer functions - the Block option was part of a complex wizard, accessed by a blog administrator.

This required the ability to authenticate a viewer - separately from the Blogger / Google login. This, in turn, made the Followers gadget complicated - and lead to occasional malfunctions.

To simplify the Followers gadget, there is no need to login to the gadget, any more.

Now, the ability to Block unwanted Followers is part of a blog administrator Stats page. On the Stats Overview page, look for the Followers count.

The number which displays the Followers count is now a link. Clicking on the number, one can access the "Manage followers" wizard.


This blog has 4,954 Followers. Click on "4,954" (right now).


And there is the "Manage followers for The Real Blogger Status" wizard. Each Follower now has a "Block" button, plainly visible.


Since only a blog administrator has access to the Stats dashboard page, there is no need for a separate Followers login. Just click on the Followers count, on the Overview page.

And the Followers gadget has only one option - the button, immediately visible to each blog viewer.
  • Follow (if not currently Following).
  • Unfollow (if currently Following).

The Follow / Unfollow button applies to administrators, authors, and readers alike. Now, there is no need to identify a person as related to a blog - except as whether this person is currently Following the blog.

Simplicity - for blog administrators, blog viewers, and Blogger developers.


When the #Blogger Followers gadget was re written in 2016, the "Options" menu - and the need to login to Following separately - was removed from the gadget.

The ability to Block selected Followers, previously part of the Options wizard, is now part of the Stats dashboard page.

Wednesday, May 25, 2016

The Featured Post Gadget, With Multiple Posts

The "Featured Post" gadget is a useful tool, for spotlighting individual posts.

One of the limitations of the gadget is that it, like many (though not all) Blogger supplied gadgets, allows only one copy on the blog, at any time. The gadget is, after all, called "Featured Post" - not "Featured Posts". Blogger does not give us the ability to feature multiple posts, simultaneously.

Given a little imagination, we can make the gadget work, for multiple posts. We can't feature multiple posts, simultaneously - but we can alternate featured posts, sequentially.

Combining the "Featured Post" gadget and labels, we can alternately feature multiple posts, in a daily or weekly sequence.

I added a label in this blog, "Featured Posts".

I identified a couple dozen posts, in this blog, which need to be featured - and gave each post the label "Featured Posts". My intention, once the Blogger Followers gadget rewrite effort is behind us, is to feature one different post in "Featured Posts", each day.

Just edit the "Featured Post" gadget, and select a different post - each day.


The "Featured Post" gadget is at the top of my blog.


I can edit the gadget, and open the label list.


And, select "Featured Posts".


That gives me a list of my posts, with the "Featured Posts" label.


And, I selected the currently featured post, "Dear Followers Of This Blog".


Next month, I may select a different post to be displayed as a Featured Post.

So I can't feature more than one post at a time - but I can alternately feature different posts. And with some planning, I can make it easy to alternately feature different posts.


The #Blogger supplied "Featured Post" gadget can't be used with more than one such gadget on any blog, simultaneously. It is called "Featured Post" - maybe, for a reason.

With a little planning, though, you can organise the posts to be featured - and change the gadget, daily or weekly.

Monday, May 23, 2016

Blogger Magic - Using "Add a Gadget"

One of the most useful features of Blogger is the ability to add many different accessories, to a blog.

There are accessories, for every blog - and for every owner preference. The "Add a Gadget" wizard, in the Blogger dashboard, is the best procedure for adding accessories, to customise a blog reliably.

Using "Add a Gadget" is a simple process. It will be most useful, in the long term, if used cautiously, however.

Adding a gadget is not difficult.


Start from the Blogger dashboard Layout page.


Click on any link to "Add a Gadget", to that template section.

This link, for instance, will add a gadget to the right sidebar.


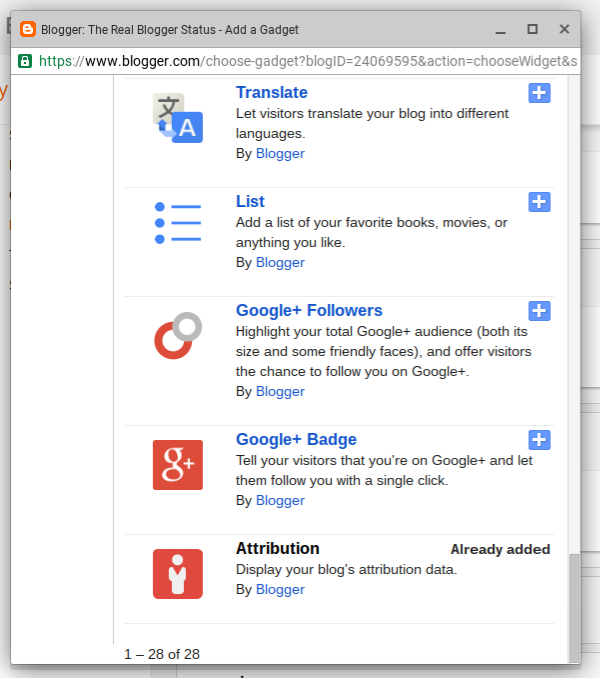
Choose any of dozens of interesting and useful accessories.


Be knowledgeable, when adding accessories.

Similar to the process of adding an HTML gadget, there are a few mistakes that you can avoid, when adding a gadget in general.

  1. Some sections of the Layout page may not allow gadgets to be added.
  2. When you find an interesting gadget, be selective!
  3. Some Blogger provided gadgets are found under "More Gadgets".
  4. Don't use "Add your own" - unless you know what you're doing!
  5. Add a new gadget, when adding important features.
  6. A gadget, as added, will be displayed on every page of the blog.

Some sections of the Layout page may not allow gadgets to be added.

Each template section can be subject to gadget limits, and to locking. This will prevent addition, removal, and / or re positioning of gadgets.

If you're unable to add, remove, or reposition a gadget, you may have to edit the template - and change the section settings.

When you find an interesting gadget, be selective!

"Add Gadget" lists gadgets produced by third party developers, as well as by Blogger Engineering. Some non Blogger produced gadgets won't benefit your blog, in the long term.


Look for "By Blogger", for the best choices.


Not all third party gadgets are intentionally malicious - but the most reliable gadgets will be explicitly labeled "By Blogger".

Some Blogger provided gadgets are found under "More Gadgets".

The "Basics" tab in "Add a Gadget" contains mostly gadgets "By Blogger" - and most gadgets "By Blogger" are found in "Basics". Some gadgets "By Blogger" are in "More Gadgets" - and you may have to search that list, carefully, to find what you need.

Don't use "Add your own" - unless you know what you're doing!

There are 3 tabs, in "Add a Gadget".
  1. Basics.
  2. More Gadgets.
  3. Add your own.
The latter, "Add your own", can lead to frustration.

If you are not familiar with coding XML gadgets (and probably do not need this advice), don't bother with "Add your own". Stick with "Basics" and "More Gadgets".

Add a new gadget, when adding important features.

You can install HTML code using the Template Editor - or you can add an HTML snippet into an existing HTML gadget - if you wish. I highly recommend that you add a new HTML gadget, for each important accessory, though.

A gadget, as added, will be displayed on every page of the blog.

By default, a gadget, once added, will be visible on every template page. You can, with some care and effort, make specific gadgets display selectively.

Enjoy adding accessories, properly.

So enjoy accessorising your blog - just accessorise carefully.


You can add any number of useful accessories, to a #Blogger blog, using the "Add a Gadget" wizard in the dashboard Layout page. The best choices are explicitly labeled "By Blogger".

Saturday, May 14, 2016

Dynamic Templates, And Improved "Follow by Email"

We see some concern about providing email subscriptions, from blog owners in Blogger Help Forum: Get Help with an Issue.

How do I provide email subscriptions for my blog? Neither Follow by Email or Subscription Links works, for email!

The blog in question is using a dynamic template. In some cases, even "Subscription Links" does not provide a "Subscribe by Email" option - and it appears that the blog owner is really out of luck.

The "Subscribe by Email" gadget does not work, with dynamic templates - and some dynamic templates don't support the "Subscription Links" gadget with "Subscribe by Email" added.

Add "Subscription Links" to a blog with a dynamic template - for some blogs.

In some cases, you may not even want to use "Subscription Links". You can, however, use a LinkList gadget, to do the same thing - and to make an improved "Subscription Links" gadget.

In this case, add "Subscribe by Email" as a linklist gadget.

Just add the "Subscription Link Code", in a linklist gadget. Here is the code, from the FeedBurner Publicize dashboard page, for my blog, Chucks Musings.


The "Subscription Management" page, and "Subscription Link Code".


Add the link caption as "New Site Name", and the link code as "New Site URL".

<a href="https://feedburner.google.com/fb/a/mailverify?uri=ChucksMusings&loc=en_US">Subscribe to Chucks Musings by Email</a>


The "Subscription Link Code" caption, and link.


Just add a new LinkList gadget.

  • New Site Name: Subscribe to Chucks Musings by Email
  • New Site URL: https://feedburner.google.com/fb/a/mailverify?uri=ChucksMusings&loc=en_US


Copy into a LinkList.


Click "Add Link" - then "Save" - and finally, "Save arrangement".


And we have a new sidebar accessory.


And if you click on the link, you get the FeedBurner "Email Subscription Request" verification form.


So, either add "Subscription Links" - or make a custom LinkList accessory. One, or the other, will give you "Subscribe by Email", in a dynamic template.


Some #Blogger blogs, which use a dynamic template, won't display "Subscribe by Email" as an added option, in "Subscription Links". Or, in some cases, you may actually want a more robust "Subscribe by Email" - or "Subscribe" menu.

In this case, add a LinkList gadget - and add the subscription form as a FeedBurner hosted form, using "Subscription Link Code".

Saturday, April 23, 2016

Would Be Followers Being Blocked By Blog Owners

This month, we have a few reports, in Blogger Help Forum: Get Help with an Issue, about problems Following some blogs.
Why am I being blocked, from Following?
Some would be Followers are taking this personally. Please, don''t do that.

What you're seeing (maybe, when trying to Follow this blog, too) is not an owner initiated conspiracy.

The Blogger Followers gadget rewrite is taking shape.


If you're trying to use a non Google account to login to Following, you'll be seeing this, for some blogs.


If you want to Follow some blogs, you will need to use a Google account. The OpenID and similar non Google logins are not usable, with Following, any more.

We were warned, several months ago, about changes to Followers.

As we mentioned some weeks ago, starting this week, we’ll remove the ability for people with Twitter, Yahoo, Orkut or other OpenId providers to sign in to Google Friend Connect and follow blogs. To follow a blog via Google Friend Connect now, readers will need a Google Account (the same they use for Gmail or YouTube).

It's happening, finally. One day, we'll have a new - and more stable - Followers gadget.


The #Blogger Followers gadget rewrite is continuing. This month, some would be Followers are seeing a notice, instead of the gadget, when they try to Follow some blogs, without Google accounts.

The Followers Gadget Rewrite Continues
Would Be Followers Being Blocked By The Blog Owner

Sunday, April 10, 2016

Music Is Personal - And Player Choice Will Be, Also

Some blog owners decide to include music, to accessorise their blogs - and the first thing they ask for is instructions.
Please give me step by step instructions, to add music.
They don't consider that adding music, for any blog, will be their personal choice - and a music player will be personal too.

The choice of music player needs to be based on the music library provided.

You will probably want your music choice to match the blog content.

Some one who wants to provide classical music won't want to add a music player, published by a disco / techno website. Similarly, if you want to decorate your blog with country music, you will not be pleased by a player provided with a jazz website.

Each music website will provide their own player, to accompany their music library - and their own installation instructions, to install their player. You will probably be provided HTML / JavaScript code, by the website - so you will want to add an HTML / JavaScript gadget.

Position the player so it is convenient and visible, to your readers.

You will want the player controls to be visible - so you should position the new gadget, in a convenient and visible location, on the blog.

The one suggestion, that is consistently provided, is that you should choose a player that lets your readers choose whether to listen to the music. Please, don't use any player that only provides "autoplay".

The choice of music will be yours - and some readers will choose to view your blog. But some will choose to not listen to your music - and unless you want to limit reader population to those who can listen as they view, you will want to make the music optional.


Some #Blogger blog owners want to decorate their blogs with music - and they request detailed instructions for adding a music player. Music players are individual to the website providing the music - and the smart blog owner will choose the website, for one offering an appropriate music library.


Wednesday, April 6, 2016

The "About Me" Gadget, And Google+

Some blog owners are accustomed to editing their Blogger profiles, from time to time.

Publishing a blog that presents oneself to ones readers, openly, is important to some blog owners. The Blogger profile becomes a blog component that is edited, periodically, to keep the blog reader friendly.

The Blogger profile editor produces content which is displayed in the "About Me" gadget, for single owner blogs. Multiple owner blogs, complementarily, display "About Us" - which provides a different display.

Google+ profiles are edited using the Google+ desktop - and Google+ desktop content does not display in "About Me", in Blogger.

"About Me" displays Blogger Profile content. Once you upgrade to a Google+ profile, you won't have access to the Blogger Profile Editor - and you'll have no way to edit Blogger Profile content.


If the blog has been upgraded, you won't be able to edit your Blogger profile.


If you can edit your Google+ profile, sufficiently, you'll be good. If not, you can work around the problem.

Just create your own custom "About Me" gadget, using a Blogger HTML or Text gadget. You can do this in under an hour.


Add an "HTML / JavaScript" gadget. That's how you start.


Use the Layout "Add a Gadget" page, add an "HTML" or "Text" gadget, and fill the gadget content with your profile. With a little work, you can make a gadget with as much detail as any Google+ page or profile.

  • Desktop banner background / icon.
  • Photos.
  • Text.
  • Video.
  • Whatever interests you - and your readers.

With a little work and imagination, you can have a blog that looks like part of your Google+ desktop.


Owners of #Blogger blogs that use Google+ profiles want to edit their "About Me" gadgets - but find no way to do that. With a Google+ profile edited using the Google+ desktop, no "About Me" displayed content is produced.

Fortunately, it's not difficult to produce a custom "About Me" gadget.

https://productforums.google.com/forum/#!category-topic/blogger/Ifg3aW2yMrg


Monday, April 4, 2016

Blogger Magic - Add An HTML Gadget

Many popular accessories start with raw HTML / JavaScript code, from different third party services.

One of the advantages of publishing a Blogger blog is the abundance of available accessories. With Blogger being in the top 3 of Internet publishing platforms, every third party service wants customers who publish using Blogger.

There are plenty of abusive or malicious accessories, that should not be installed, even when offered - and there are ways to best install the accessories, that can be safely installed.

Most accessories, from third party services, will be provided as HTML / JavaScript.

To add HTML / JavaScript code, to a blog, you can use any of several techniques - though using a new HTML / JavaScript gadget is the smartest choice. Adding an HTML gadget, to a Blogger blog, is not difficult.

Add an HTML / JavaScript gadget, using "Add a Gadget" in Layout.

  1. Start from the "Layout" dashboard menu page.
  2. Click "Add a Gadget".
  3. Click the "+" button, for "HTML/JavaScript".
  4. Paste the code, given to you, into the "Content" box.
  5. Click "Show HTML/JavaScript", if the option is provided.
  6. Click "Save".
  7. Position the new gadget anywhere in the Layout display.
  8. Click on "Save arrangement".

Start from the dashboard Layout page, and select any convenient link to "Add a Gadget". Select "HTML/JavaScript" from the "Basics" tab, in the "Add a Gadget" wizard.


Select "HTML/JavaScript" in "Basics".


Paste the code, that you have to add, into the "Content" window, in the "Configure HTML/JavaScript" wizard. And if you wish, give your new gadget a Title.


Paste the code that you have, into "Content" - with the wizard in HTML mode ("Rich Text" displayed).


And select "Show HTML/JavaScript", if provided for this template - then click on "Save". Finally, click on "Save arrangement".

Avoid several well known mistakes, when adding gadgets.

There are mistakes, that you can avoid - if you know what to do.

  • Be selective, when adding third party code.
  • Add a gadget, using "Basics".
  • Edit an HTML gadget, with "Rich Text" displayed as the caption (for HTML) - or with "Edit html" displayed as the caption (for Rich Text).
  • With a dynamic template, attach or embed the content in a static page.
  • With a mobile display, enable the gadget, if you want it to be viewed.
  • With templates that have a disappearing sidebar, position the gadget in the footer.
  • If "Show HTML/JavaScript" is provided for this template, select that option.

Be selective, when adding third party code.

It's your blog - and you are allowed to install any accessories and tweaks that interest you. For long term stability and success, though, you should try to only install code from reliable sources.

Your readers will be happier, with your blog using reliable accessories.

Add a gadget, using "Basics".

You'll start with an "Add a Gadget" link, on the dashboard Layout page - and the "Add a Gadget" wizard.

The "Add a Gadget" wizard has the "Basics" tab, with the "HTML / JavaScript" gadget in the list - and it has the "Add your own" tab. You should find the "HTML / JavaScript" gadget, in "Basics".

Edit an HTML gadget, with "Rich Text" / "Edit html" displayed as the caption.

The "HTML" / "Text" gadgets, intriguingly have the "Edit Html" / "Rich Text" tabs.

If you want to add / edit HTML or JavaScript, the caption should read "Rich Text".


The HTML gadget, in HTML mode.


Conversely, if you want to add / edit text, the caption should read "Edit html".

It's your choice. The "HTML / JavaScript" and "Text" gadgets are the same - just the captions ("Edit html" and "Rich Text") differ.

With a dynamic template, attach or embed the content in a static page.

Adding gadgets to dynamic templates is not a straightforward process. Gadgets have to be written specifically to support dynamic templates - and the HTML gadget is not written for this.

If you want an HTML gadget to work in a dynamic template, you'll need to attach or embed the gadget, in a static page.

With a mobile display, enable the gadget, if you want it to be viewed.

By default, the "HTML / JavaScript" gadget does not display, on a mobile browser. You will have to use the Template Editor, and enable the gadget to display, in mobile mode.

With templates that have a disappearing sidebar, position the gadget in the footer.

Some Responsive class templates have a sidebar that is hidden by default. To see the sidebar, you click on the "hamburger" icon in the header.

If you want your new gadget to work with the blog loaded - even without the sidebar showing - you need the gadget in a visible section. The footer is a better choice, in this case.

If "Show HTML/JavaScript" is provided for this template, select that option.

If the option to "Show HTML/JavaScript" is provided in the "Configure HTML/JavaScript" wizard, be sure to select that - if you want the gadget to operate, with the blog loaded. If the gadget should not be visible to the reader, but it needs to operate, you still must enable this option.

It's your blog.

There are ways to make an HTML gadget work, while ignoring the above advice. Long term success will be much more likely, though, with attention to the details.


One of the most common accessories, added to a #Blogger blog, starts with an HTML / JavaScript gadget. This is a very versatile gadget - and it's not difficult to install. There are several common sense details, however.

Saturday, April 2, 2016

Disable AdSense Gadgets, On Static Pages

One problem with AdSense, that some blog owners have reported, is that AdSense ads are not permitted on pages with very little AdSense relevant content.

Unfortunately for some blog owners, the responsibility for preventing this is left to the blog owner.

Blogs with static pages, and AdSense gadgets in the sidebar, are a problem here. Static pages with little blog relevant content - such as label indexes, expanded owner profiles, special gadgets like Followers displays - cause problems with the AdSense ad classifier - and can cause blogs to lose ads.

As an AdSense publisher, the blog owner is expected to ensure that ads are not displayed on unsuitable blog pages.

Fortunately, it's not difficult to block AdSense ads from static pages. Just add a CSS rule with a "static page" conditional, to block display of each AdSense gadget.

<b:if cond='data:blog.pageType == "static_page"'>

If you want to block gadget "AdSense1" from displaying on all static pages, that's a simple CSS rule, added using "Add CSS".

Note that I wrote this to selectively block AdSense gadgets from displaying - but you can use it with any gadget, that you need to block. AdSense is simply one gadget that needs to be selectively displayed.


<b:if cond='data:blog.pageType == "static_page"'>
<style>
#AdSense1 {display: none !important;}
</style>
</b:if>


As always, be aware that the blank line above and below the code, as displayed here, is not intended to be decorative. Any time you add CSS rules, the blank line is required, to separate each CSS rule - and make each rule operational.

If the blog publishes actual blog content on some static pages, conditionals will be a bit more complicated. This is one more reason why static pages are not typically used for blog content.


Owners of #Blogger blogs with AdSense ads, that use static pages without AdSense relevant content, need to block ads from displaying on such pages. Failure to display ads selectively can cause problems with ads on the blog.

Fortunately, a simple CSS rule can be used, to block ads from static pages.

https://productforums.google.com/d/topic/blogger/7ANVOrQuvIo/discussion

https://productforums.google.com/d/topic/blogger/-p6mdLF2B08/discussion


Friday, April 1, 2016

Add A Fixed Location "Subscribe" Button To Your Blog

To encourage email subscriptions, and other social connections, some blog owners provide gadget toolbars, with useful links.

Some blog owners would like to position their gadgets in fixed screen positions.
I want to have a subscribe button hover at the top of the page, while people read my blog.
This blog has a hovering AddThis toolbar, which provides selected social sharing options. And, it has a hovering "Top of Page" button.

Adding a custom subscription gadget, in a fixed screen location, is not complicated.

AddThis has a large library of social sharing gadgets, with their icons - but they don't have any email subscription selections. But you can add an icon based "subscribe" button, "hovering" at the top of the page.

An occasional request suggests using a popup window, containing a subscription form. We don't recommend using a popup window - but a subscription form, on a FeedBurner hosted page, will provide the same function.

  1. Add FeedBurner "Subscribe by Email".
  2. Add a "Subscribe by Email" FeedBurner hosted form, and a link.
  3. Add a suitable icon, containing the FeedBurner subscription link.
  4. Try It.

See below "See the code asssembled.", for the detailed procedure.

Add FeedBurner "Subscribe by Email".

Using the dashboard Layout page, and "Add a Gadget", add a "Subscribe by Email" gadget. This creates a blog posts FeedBurner hosted feed.

FeedBurner provides the "Subscribe by Email" gadget, with the choice to display either an on screen form - or a simple link to a FeedBurner hosted form page.

Add a "Subscribe by Email" FeedBurner hosted form, and a link.

Once a "Subscribe by Email" gadget has been added, get the gadget link from the FeedBurner dashboard, at Publicize - "Email Subscriptions" - "Subscription Management" - "Preview Subscription Link…".


Start from the dashboard, at Publicize - "Email Subscriptions" - "Subscription Management".


The "Preview Subscription Link…" window contains the code, that we need.


Add a suitable icon, containing the FeedBurner subscription link.

Choose an attractive icon to contain the FeedBurner supplied link. Add an HTML gadget using "Add a Gadget", containing the icon with the link to the FeedBurner form - and displayed in a fixed location.


Try It.

I added a button, and a new subscription, to my test blog, "Chucks Tech World".


See the icon, in the top right margin?


See how the new icon floats?


See how it floats from the top - and from the right?


See the code, assembled.

A floating subscription button is simply an "HTML / Javascript" gadget, containing button code, linking to a FeedBurner subscription form. I position my gadget, in the footer, out of sight. The code "top:40px;right:60px;" positions the button to display relative to the top right corner - regardless of where the HTML gadget is positioned.

  1. Upload a suitable icon.
  2. Add the FeedBurner Subscription link code.
  3. Add the button code.

Start with an icon, uploaded:

<a href="https://blogger.googleusercontent.com/img/b/R29vZ2xl/AVvXsEii2fCZTJEcS0rg0NliF0abn3LvuRvBFczagaR3aJo66JQ2X2VzNScrxHothiYOgP83ZrrLHN7fFcFeA5ihXLTdIHu8oO7kaxaILeNXcICvNkVNwj2pVG86bXn2qyvJd13-luA-hoijps09/s1600/Subscribe+Icon.png" imageanchor="1" ><img border="0" src="https://blogger.googleusercontent.com/img/b/R29vZ2xl/AVvXsEii2fCZTJEcS0rg0NliF0abn3LvuRvBFczagaR3aJo66JQ2X2VzNScrxHothiYOgP83ZrrLHN7fFcFeA5ihXLTdIHu8oO7kaxaILeNXcICvNkVNwj2pVG86bXn2qyvJd13-luA-hoijps09/s320/Subscribe+Icon.png" /></a>

Here's the FeedBurner Subscription Link:

<a href="https://feedburner.google.com/fb/a/mailverify?uri=ChucksTechWorld&loc=en_US">Subscribe to Chucks Tech World by Email</a>

Here's the Floating Top Of Page Button:

<a style="display:scroll;position:fixed;bottom:20px;right:60px;" href="#" title="Top"><img border="0" height="60" width="60" src="https://blogger.googleusercontent.com/img/b/R29vZ2xl/AVvXsEh2eOcCRS3N1_JwNrk6zva82CQybo8TWCvgMs6lUtZhyl_6XrkbjWP8Ayf2eQLtg3KEaUMruYNMT3uHK7llf3gltPNd6PMaMEjSWXuTpPzCX-fAebzTg5xQTb9kdRRiRhVVm347DAyfZzdk/s320/Up+Arrow+4.jpg" /></a>

And put them all together:

<a style="display:scroll;position:fixed;top:40px;right:60px;" href="https://feedburner.google.com/fb/a/mailverify?uri=ChucksTechWorld&loc=en_US" title="Subscribe by Email" target="_blank"><img border="0" height="60" width="60" src="https://blogger.googleusercontent.com/img/b/R29vZ2xl/AVvXsEii2fCZTJEcS0rg0NliF0abn3LvuRvBFczagaR3aJo66JQ2X2VzNScrxHothiYOgP83ZrrLHN7fFcFeA5ihXLTdIHu8oO7kaxaILeNXcICvNkVNwj2pVG86bXn2qyvJd13-luA-hoijps09/s320/Subscribe+Icon.png" /></a>

And that's it.

I now have a hovering subscription icon, in this blog. Given a collection of icons, carefully arranged, you can have a hovering toolbar - to maybe complement a social media button toolbar.


Some #Blogger blog owners would like a hovering button or toolbar, to provide an email subscription form. This is an accessory that is not difficult to add.

Thursday, March 24, 2016

Dynamic Templates, And "Follow by Email"

We see occasional concern about providing email subscriptions, from blog owners in Blogger Help Forum: Get Help with an Issue.

How do I provide email subscriptions for my blog? Follow by Email does not work!

The blog in question is using a dynamic template - and it appears that the blog owner is out of luck.

The "Subscribe by Email" gadget does not work, with dynamic templates.

Add "Subscription Links" to a blog with a dynamic template.

For email subscriptions, and a blog with a dynamic template, you use the "Subscription Links" gadget. Here is my blog, Chucks Musings.


Use "Subscription Links" with a blog that has a dynamic template.


When you add "Follow by Email" to a blog with a non dynamic template, it sets up the "Email Subscriptions" service, in FeedBurner. "Subscription Links" is a collection of various subscription services - and won't activate "Email Subscriptions".

You may need to activate "Email Subscriptions".


You will probably need to activate the "Email Subscriptions" service, to use "Subscription Links" instead of "Follow by Email".


To use "Subscribe by Email" as a selection in "Subscription Links", be sure that the "Email Subscriptions" service is activated, from the FeedBurner dashboard.

Alternately, add "Subscribe by Email" in a linklist gadget.

Sometimes, you may not want to use "Subscription Links". So, just add the "Subscription Link Code", in a linklist gadget.


Here, we have a new sidebar accessory.


And when you click on the link, you get the familiar FeedBurner "Email Subscription Request" verification form.


So, either add "Subscription Links" - or make a custom LinkList accessory. One, or the other, will give you "Subscribe by Email", in a dynamic template.


Owners of #Blogger blogs, wishing to provide email subscriptions, find that "Follow by Email" won't work with a dynamic template. Fortunately, "Subscription Links" will provide email subscription - though the necessary FeedBurner service has to be activated.

https://productforums.google.com/forum/#!category-topic/blogger/lsAVQuj_FOw

Wednesday, March 16, 2016

Add A FaceBook Gadget With FaceBook SDK Code

Some blog owners can't get their new FaceBook gadgets to work, on their blogs.

We see the occasional report, in Blogger Help Forum: Get Help with an Issue.

The blog won't accept the code that Facebook Developer generated for me.

Adding HTML gadgets - and HTML gadgets using FaceBook code - can be frustrating. But, it's possible.

Adding a FaceBook gadget, to your blog, is not difficult - but success is found, in the details.

  • Add the gadget as a new HTML gadget.
  • Add the FaceBook SDK code, to the first FaceBook gadget.

Add the gadget as a new HTML gadget.

Blog maintenance is far easier, with a FaceBook gadget - or any other HTML / JavaScript based accessory - added as content, in a new HTML gadget - far smarter than using Template Editor.

Add the FaceBook SDK code, to the first FaceBook gadget.

FaceBook instructs us to add SDK code to each page which will display a FaceBook gadget - but advises that we should only add the SDK code once / page.

Gadget code, as provided by FaceBook Developers:

<div class="fb-comments" data-href="http://ourladyofoutrage.blogspot.com/" data-numposts="5">
</div>

Gadget code, as added to a new HTML gadget:

<div id="fb-root">
</div>
<script>(function(d, s, id) {
var js, fjs = d.getElementsByTagName(s)[0];
if (d.getElementById(id)) return;
js = d.createElement(s); js.id = id;
js.src = "//connect.facebook.net/en_US/sdk.js#xfbml=1&version=v2.5&appId=528167400699401";
fjs.parentNode.insertBefore(js, fjs);
}(document, 'script', 'facebook-jssdk'));</script>

<div class="fb-comments" data-href="http://ourladyofoutrage.blogspot.com/" data-numposts="5">
</div>


A new FaceBook gadget, being added.


Just pay attention to the details, for best results.


Some #Blogger blog owners try to add accessories provided by FaceBook Developers, without success. They don't realise the importance of the details involved.

Tuesday, March 8, 2016

Train Security Products, And Keep Your Blog Clean

Everybody who uses a computer - and expects to use their computer for any amount of time - has one or more protective products on their computer.

Anybody who publishes a blog, with an audience that has any need for security, is going to receive occasional reports from would be readers.

I can't read your blog! My computer displays an "Unsafe website!" warning!

All computer security products, unfortunately, will occasionally generate false positives. Analysing false positive malware reports is as much a part of every security product, as identifying the actual malware.

If you publish a blog, you need to know how to handle reader malware alert reports.

Know online tools, for researching reported problems.

Google provides 2 websites, for analysis of blog / website malware alerts. Both Google SafeBrowsing, and VirusTotal, are Google products that can help to identify actual problems with blogs and websites.

Besides the two Google products above, I use 3 security analysis websites, which can identify specific security problems in blog / website code. Quttera Online Website Malware Scanner, and Sucuri SiteCheck, and Trend Micro SIte Safety Center, have been useful at various times, when a security problem is reported.

You may, from time to time, use all of these - and possibly others - in identifying and verifying a security problem with your blog, or with blogs and websites that you link. For best results, always specify the canonical blog URL, when requesting security analysis - and when sharing the blog, or individual posts.


Specify the canonical URL.


Not a country local domain.


Know what you need to do, to keep your blog healthy.

As a blog publisher, you will occasionally have 2 jobs to do, when receiving a malware alert report which references your blog.

  1. Verify / identify / remove any actual malicious content.
  2. Report false positives, to the protective service displaying a false positive.


Everybody who publishes a blog, with any reader audience, has seen this advice, or something similar, when surfing their blog.


Know how to keep your blog clean - and your reputation clean.

You have to use online malware analysis services, to identify any problem which you may have created, by installing the latest "gotta have this!" accessory on your blog. And, you have to report any false positive alert, to the owners of any security product, that falsely identifies your blog as a problem.

You do both, to support your readers. You do not want your readers computers hacked, through your inappropriately accessorising your blog - but at the same time,you want your readers to be able to read your blog.

  1. Keep your blog content clean.
  2. Keep your blog reputation clean.

Do both - or you may not have readers, to read your blog.


Any #Blogger blog owner needs to support the blog readers, by publishing a blog clean of any malware, and with a good reputation with the various security products that prevent malicious action by dangerous blogs and websites. Your readers need the ability to use their computers to read your blog - and they need their security to not falsely identify your blog as a problem.

Monday, March 7, 2016

Some bX Codes Caused By Zero Alpha ("rgba") Value

We're seeing a few reports of bX codes, that are not solved by simply resetting the template - and do not involve the mysterious "500 Internal Server Error".

In some cases, the blog owner may see a bX code when trying to use "Configure Blog Posts", or another Layout gadget wizard. If the blog itself can be viewed, and Template HTML Editor is usable, the bX error may come from use of a "0" Alpha color setting.

Blogger Engineering is aware of the problem, and has suggested that a fix is being developed. While we await the necessary fix, we may need to work around the problem.

The suggestion by Blogger Engineering is that we use a "Transparent" option, instead of "0" alpha value.

It seems that this issue is triggered by color variables with a value that has zero alpha, e.g. 'rgba(0, 0, 0, 0)'.

Some gadgets, and template sections, have the "transparent" selection in their color setup. Not all have this option, however. Some template CSS rules are not so easily edited.

The problem here is the "rgba" 4th value of "0" - ie, the "alpha" "0" value. The simplest solution is to change the "0" to a non zero value - without changing the "rgb" values.

The simplest solution, to get "Configure Blog Posts" or any other affected gadget usable, may be to use Template Editor, and change the values, directly. Look at every CSS rule, that has an "rgba" setting - and look for a 4th value of "0".

  • For "rgba(0, 0, 0, 0)" - Change to "rgba(0, 0, 0, .1)".
  • For "rgba(255, 255, 0, 0)" - Change to "rgba(255, 255, 0, .1)".
  • For "rgba(255, 255, 255, 0)" - Change to "rgba(255, 255, 255, .1)".

A transparency setting of ".1" should be visually close to "0" - and should get the blog in question back online and updatable. And after Blogger Engineering fixes their gadget / template editor code, to accept the "0" value - and if the ".1" creates a noticeably unacceptable condition - this can be corrected, when necessary.

It's possible that this error, being seen, is part of a larger problem. You may need a persistent solution.


Some #Blogger bX codes, being seen in the forums right now, do not appear to involve terminal template corruption, and the mysterious "500 Internal Server Error". Some bX codes can be easily corrected, when they involve a "0 alpha" value (a CSS color rule involving an "rgba" setting).

When the Template Editor is usable, a simple search and replace for "rgba(nn, nn, nn, 0)" to "rgba(nn, nn, nn, .1)" may be sufficient to correct the error.

Saturday, January 3, 2015

Adding A "Top Of Page" Button To The Blog

This week, I added a gadget that's been needed, on this blog, for some time.

You may see my new "Top" button, at the lower right corner of this blog. If you have a normally wide browser window, with wallpaper showing on either side of the posts / sidebar section, you'll see the new gadget floating on top of the wallpaper. If you have squeezed your browser window to save horizontal space, you may see the new gadget floating on top of the sidebar (but beneath the sidebar gadgets).

This is an extremely easy tweak to add. The hard part was finding - and sizing - the icon that I used.

To find a suitable icon for the button, Google for it.

To find the icon, Google Is Your Friend. Just look through the search listings, until you find one that fits with your blog.

free up arrow icon

Once you have found an icon that you like, download to your computer - then upload to your blog - politely. Don't hot link icons.
  • Hotlinking is rude, and may abuse somebody's limited bandwidth.
  • Hotlinking depends upon somebody's intention to host their icons, using their service, for eternity (however long you publish your blog, anyway).

Once your chosen icon is saved as a blog image, setup the button code.

Once you have your icon politely saved as part of your blog, add an HTML gadget - and add the gadget code, in the Content window of the HTML gadget.

<a style="display:scroll;position:fixed;bottom:20px;right:60px;" href="#" title="Top"><img border="0" height="60" width="60"  src="https://blogger.googleusercontent.com/img/b/R29vZ2xl/AVvXsEh2eOcCRS3N1_JwNrk6zva82CQybo8TWCvgMs6lUtZhyl_6XrkbjWP8Ayf2eQLtg3KEaUMruYNMT3uHK7llf3gltPNd6PMaMEjSWXuTpPzCX-fAebzTg5xQTb9kdRRiRhVVm347DAyfZzdk/s320/Up+Arrow+4.jpg" /></a>

Here's the magic.

style="display:scroll;position:fixed;bottom:20px;right:60px;"

That positions the icon in a fixed location on the screen. The new HTML gadget contains the code - and can be located anywhere in the blog. The magic determines where the icon is displayed.

Adjust settings, to make the button appear in an acceptable screen position.

Adjust "Bottom" and "Right" values, to position your new icon in the desired location, for your blog. Resize the browser window a few times - make it narrower and wider - and get an idea how the final location of the icon may vary. Test in different browsers, too.

This is my icon:

https://blogger.googleusercontent.com/img/b/R29vZ2xl/AVvXsEh2eOcCRS3N1_JwNrk6zva82CQybo8TWCvgMs6lUtZhyl_6XrkbjWP8Ayf2eQLtg3KEaUMruYNMT3uHK7llf3gltPNd6PMaMEjSWXuTpPzCX-fAebzTg5xQTb9kdRRiRhVVm347DAyfZzdk/s320/Up+Arrow+4.jpg

Your icon will have a different URL. Use your own icon, please!

Then sit back, and enjoy your blog, with its new navigational aid.

A caveat.

If you add your "Top Of Page" button code into a page or post, never switch between Compose and HTML modes, when editing that page or post.

Sunday, December 14, 2014

NeoWorx, And The Redirecting NeoCounter Gadgets

This week, we're seeing the anxious query, in Blogger Help Forum: Get Help with an Issue.
Is my blog for sale? I try to view my blog, and I see
This Domain Is for Sale
Have I lost my blog?
Fortunately, in most cases, the answer is "No, your blog is not for sale." - and "No, you have not lost your blog!".

In mid 2014, NeoWorx, the publisher of popular gadgets like NeoCounter, closed up shop. Back end code for their gadgets, installed on thousands of blogs and websites, had been served from their private libraries. Having closed their domains, the gadgets stopped working.

Initially, "neoworx-blog-tools.net" was purchased by a squatter.

The squatter apparently had hoped to capitalise on the traffic to the domain, provided by the blogs and websites that used the installed gadgets. In late 2014, the squatter gave up (or possibly, sold to another squatter), and "neoworx-blog-tools.net" is now showing a very plain parked page.
This Domain Is for Sale
Either the squatter made a profit on his purchase, by serving ads to the would be viewers of the host blogs and websites, and decided to cash in - or he lost his investment, and decided to cut his losses and move on.

In theory - and by early Internet rules of etiquette - anybody purchasing a domain that has accumulated traffic from the efforts of the prior owner, and expects to be receiving traffic from unwary people like our blog readers, should put advice on their home page.
Sorry, NeoWorx (publisher of NeoCounter and other blog / website accessories) is no more.
or
Looking for NeoCounter? Try their new website.
The advice, to at least accompany the ads displayed there, would provide a brief hint to the unwary reader, that what he sought (i.e., blog content - or a given gadget) is no longer available (as suggested by the first advice). If NeoWorx had renamed themselves, or been bought out, the second advice would have been useful.

The initial purchasers of "neoworx-blog-tools.net", in defiance or ignorance of etiquette, simply served a page full of ads, and no advice. The ads did not target the owners of the blogs and websites - they simply confused the unwary readers - and provided no hints of why they were there, instead of viewing the blog or website.

Subjected to waves of complaints from angry readers, the blog owners had earlier posted in Blogger Help Forum: Get Help with an Issue.
Why is my blog directing to a page full of ads?
And we would examine the blog code in our browsers, find the gadget which references "neoworx-blog-tools.net", and instruct the blog owner to remove the gadget.

Now, instead of angry readers, who complain of ads, the blog owners suffer questions from confused readers, asking if the blog is being sold. And we continue to advise people to remove the misbehaving gadgets.

To the former owners of NeoWorx, and the subsequent domain owners:
Blogger blog owners are not cash cows.
We appreciate accessories, if you can support them. But please, don't produce gadgets that require your program libraries, run up huge volumes of traffic to your library domains, then sell out to spammers.

Here, we have one very real example why adding gadgets from third party developers may not always be in your best, long term interest.

Monday, December 8, 2014

Use Common Sense, And Protect Your Blog

We see various questions about getting advice and non standard accessories / code, from blogs and websites advertised outside Blogger / Google control - generally in Blogger Help Forum: Get Help with an Issue.
Why can't I see my blog? Every time I click on "View blog", I get a face full of ads!
and
Where can I get accessories, gadgets, and templates for my blog??
and
How do I know what accessories, gadgets, and templates are safe, for my blog?
and
Why did Blogger lock my blog, as a malware host?
All of these folks are discussing the same issue - blog content security. Some are asking properly, before they cause their problems - but others are not.

We have several known bad actors, right now - who have been putting out various blog accessories which, initially, work fine.

After thousands of victims have installed some accessories on their blogs, the owners and readers observe that the blogs are suddenly redirecting to advertising pages, or throwing popup ads on top of blog content. The latency period, for some blogs which are the first to install a new hacker provided gadget, may be as long as 6 months to a year.

By the time any malicious gadgets are discovered, identified, and removed, the victims have to deal with unhappy readers, who don't enjoy seeing a screen full of ads, instead of their favourite blog to read.

Search engine reputation is also affected by this problem. In some cases, the malicious gadgets may be detected by Blogger - and the host blog (ie, your blog) is locked, as a suspected malware host. Even if Blogger does not detect a problem, services outside Blogger will trash your blog.

Thoughtful blog owners will ask how they can get good, reliable, and safe blog accessories. I would start, by ranking the possibilities.
  1. Blogger "Add a Gadget", with gadgets labeled "By Blogger".
  2. Websites provided by well known Internet services.
  3. Blogger "Add a Gadget", with gadgets not labeled "By Blogger".
  4. Non Blogger websites provided by developers.
  5. Non Blogger websites provided by hackers and spammers.


1. Blogger "Add a Gadget", and gadgets labeled "By Blogger".

The most reliable and safe gadgets will always be found in the "Add a Gadget" library, and be labeled "By Blogger". You have to trust Blogger, if you are going to use their publishing platform in general.

The optional gadget library, and gadgets "By Blogger", is just as safe as the dashboard, and components referenced by the dashboard.

2. Websites maintained by well known Internet services.

Most well known Internet services and social networking platforms will provide gadgets that are designed for Blogger. The best gadgets will be labeled "For Blogger", and be written in Blogger compatible XML. Some general purpose gadgets, written in HTML / JavaScript, will also be suitable.

Almost any gadget in this category, if written by the staff of the service in question, will be free from malicious intent. Both FaceBook, and Twitter, for instance, provide gadget libraries. Because these gadgets were not written by Blogger staff, they will not be as reliable as Category #1.

3. Blogger "Add a Gadget", and gadgets not labeled "By Blogger".

Many gadgets provided in "Add a Gadget" will be provided by third party developers. Hopefully, Blogger / Google exercises some quality control, over gadgets distributed through their library.

That said, the first mass hacking of Blogger blogs, of 2009 - 2010, came through gadgets that were distributed from the "Add a Gadget" libraries. One such gadget was discovered, just last week.

Not all third party accessories are provided with malicious intent. Unfortunately, even if not provided maliciously, some accessories may be unreliable because of periodic changes by Blogger.

4. Non Blogger websites provided by developers.

After the unforgettable blog hijacks of 2009 / 2010, then 2010 / 2011, Blogger / Google Security got aggressive with the problems of malicious gadgets being served from their libraries. Most recent hacking attacks have been distributed from websites outside the control of Blogger / Google.

Some non Google websites are provided by third party developers, who write code almost as reliable as Blogger staff. However, if the choice for my blog was between gadgets in Categories #3 and #4, and be of equal functionality and suitability, I would choose #3 over #4 - and I would seriously recommend the same, if asked.

In some cases, legitimate third party developers have provided accessories that require access to their code libraries. The developers have gone out of business, and have cancelled the domains where the code libraries were served. The abandoned domains have been bought by spammers, as investments - based on serving ads to accumulated incoming traffic, from people surfing to the blogs and websites which have the accessories installed.

In some cases, the domains were actually abandoned by the developers. In other cases, the developers were spammers, who sold their domains for a good profit, to other spammers.

We, the blog owners, cannot really tell which case is involved, when our blogs start redirecting to pages of spam - or even malicious domains, serving malware to our readers. We do need to protect our readers, though.

5. Non Blogger websites provided by hackers and spammers.

Some websites outside the control of Blogger / Google should not be trusted. I would seriously suggest without hesitating, that you stay away from websites like "SEOYourBlog.com", "MakeMunyFromHome.info", and such.

Any blog or website, with clever initials in the name, should be considered, with great caution. Although "SEO" was originally a serious concept, most websites with "SEO" in the name will not have your best interests in mind. Likewise "GPT, "PTC", "PTS" will do you no good.

If and when you add gadgets, always add them using a new HTML / JavaScript gadget. Gadgets added using "Add a Gadget" can be easily removed, if they go bad. Gadgets added using "Edit HTML" must be removed using "Edit HTML" - and some gadgets will be extremely challenging to diagnose and remove.

Security begins with you.

Friday, December 5, 2014

Simple Edit / Removal Of Problem Blog Gadgets

Blog owners frequently have to edit or remove various blog gadgets - and sometimes need coaching, to edit or remove.

Editing or removing gadgets, normally, is pretty simple - when you know what you're looking for. Whenever you are logged in to Blogger, as a blog administrator, you can find the "Edit" link, on the dashboard Layout wizard - or the "Quick Edit" link on the blog (when "Quick Edit" is enabled), as displayed.

Sometimes, identifying a problem blog gadget, to another person, isn't easy. What happens, if someone misreads your instructions?

Even when identified, it may not be a simple task to locate a given gadget.
  • The "Quick Edit" option may not be enabled, on a blog.
  • Even when "Quick Edit" is enabled, a blog with lots of gadgets may be tedious to search, looking for the gadget in question.
  • Mistakes can be made. What happens, if you click on the wrong link, and remove the wrong gadget?
  • When a malicious or misbehaving gadget is involved, either loading the blog or the dashboard may produce unacceptable results.

Fortunately, with the right diagnostic work, we may not have to load either the blog, or the dashboard, to edit or remove an identified gadget.

Start by locating, and identifying, the gadget in question. As an example, I will use a gadget from my test blog. First extract the code, for gadget "HTML13" - my so called "Empty HTML Gadget".
<div·class='widget·HTML'·id='HTML13'>(LF)
<h2·class='title'>Empty·HTML·Gadget</h2>(LF)
<div·class='widget-content'>(LF)
This·is·a·(<span·style="font-weight:bold;">somewhat</span>)·empty·HTML·gadget.(LF)
</div>(LF)
<div·class='clear'></div>(LF)
<span·class='widget-item-control'>(LF)
<span·class='item-control·blog-admin'>(LF)
<a·class='quickedit'·href='//www.blogger.com/rearrange?blogID=6231987187698503326&widgetType=HTML&widgetId=HTML13&action=editWidget§ionId=sidebar-right-1'·onclick='return·_WidgetManager._PopupConfig(document.getElementById("HTML13"));'·target='configHTML13'·title='Edit'>(LF)
<img·alt=''·height='18'·src='http://img1.blogblog.com/img/icon18_wrench_allbkg.png'·width='18'/>(LF)
</a>(LF)
</span>(LF)
</span>(LF)
<div·class='clear'></div>(LF)
</div>
Look for "quickedit" - and extract the "href" value.
//www.blogger.com/rearrange?blogID=6231987187698503326&widgetType=HTML&widgetId=HTML13&action=editWidget§ionId=sidebar-right-1
Be really careful here - extract the complete string, between the ' ... '.

Add "https:" to the front of the extracted value.
https://www.blogger.com/rearrange?blogID=6231987187698503326&widgetType=HTML&widgetId=HTML13&action=editWidget§ionId=sidebar-right-1
And there is the exact URL needed, to access the Edit wizard, for the gadget, "HMTL13".

Now, to point out the "obvious".
  • The URL will work, for the gadget on any blog, even if "Quick Edit" is not enabled for the blog - for a blog administrator.
  • The URL will not work, for the gadget on any blog, even if "Quick Edit" is enabled for the blog - for a non blog administrator.
  • Disclosure / possession of the URL poses no security threat to your blog - nor any benefit to a hacker. Try the link below, and see for yourself.
  • Even if you are logged in as an administrator, the URL may not work - if "third party" cookies are not enabled.

The URL is simply a tool, which can be extracted, by anybody - and can be used, by a blog administrator (and only by a blog administrator), when properly logged in to Blogger.

Having noted the "obvious", your life can be a bit simpler, when instead of having to instruct someone how to locate and use the correct "Quick Edit" or Layout Edit link, to remove a problem gadget, you simply instruct them.
Login to Blogger, and click on the link below:
https://www.blogger.com/rearrange?blogID=6231987187698503326&widgetType=HTML&widgetId=HTML13&action=editWidget§ionId=sidebar-right-1.
Then click "Remove".

Now, extract and try a link from your blog - and see for yourself. Isn't that simpler?

Navigate» Become author for this Blog