Showing posts with label Graphics. Show all posts

Thursday, July 12, 2018

Gravit Designer Software for Graphic Design

Gravit Designer
Today, we are going to tell you about an easy-to-use graphic design tool.Are you also constantly working on the Internet, Are you making Youtube videos, Covers, Post? So Gravit Designer is one of the easiest tools to create an image.We are not all good graphic designers.But you also want to have a good quality image.So you can use the Gravit Designer tool to create a professional image in a short time like good graphic designer.

Why should Gravit Designer be used?


Many people use softwares like adobe photoshop.But everyone does not have much knowledge to use such a great software.So, for this reason, there are many situations where you can not create a good professional image.And even using software such as Gimp will take a long time.But you can quickly and easily create a professional photo with this Gravit Designer Software.Also, this small software is easier to use than using large software for small-scale designs.

Also read: How to Edit an Image Without Installing Adobe Photoshop.

The benefits of using Gravit Designer.


You should add a text to a photo.Create a Featured Image in a post in the web.Create a thumbnail of the Youtube Video.In addition, this software can do many things like designing a simple logo.You can also use this Gravit Designer software online.There you can even open the files on your computer.

Gravit Designer

This can also be done on your Linux, Windows, MacOS.In short, this Software is a Cross Platform.In addition, you can install an extension for the Gravit Designer software in the google chrome browser.It will be more important to you in the future.However, this can be referred to as a multi-tasking tool.For example, the Youtube Logo.You can search the logos you want with this software.


Also read: How to Install Google Chrome Extensions for Opera.

So now you understand that a small tool is a good tool with lots of work anyway.So, you can also try out an experiment using this tool.So you know about Gravit Designer Software for Graphic Design, Hope you like the post, don’t forget to share it with your friends and leave a comment below if you are facing any problem at any step in the method discussed above.Thank you

Wednesday, June 20, 2018

How to Use Frequency Separation in Photoshop

How to Use Frequency Separation in Photoshop
If you also use photoshop, this post will be important to you.We do the skin retouching through photoshop.We use various tools for it. Especially, the healing brush tool is used.So think you've found a pimple skin for retouching.Which tools do you use in there? In most cases, the clone stamp tool is used.But if you use those tools, the original image is damaged.For this purpose, you can use Frequency Separation in photoshop retouching powerful method.
By using this Frequency Separation you can retouching yourself professionally.There is no harm.So let's see how to do this today.
  1. First Open Photoshop and open the photo you want.
  2. Then use ctrl + j to get the 3 copies of the image layer.
  3. With the three layers, rename the middle layer as Low.(Double click on the layer to rename layers)Low is Low frequency.That is, combining colors.
  4. Then rename the top layer as High.High is a High frequency.That's the skin texture.
    Frequency Separation in Photoshop
  5. In the next step,Off the High layer and click Low layer and go Filter >> Blur >> Gaussian Blur.There should be a slight blur(Example Blur count 2.5).
  6. Next On the High layer and go Image >> Apply Image.Then set the setting as the following image.
    Frequency Separation in Photoshop
  7. Next, choose high layer blending mode in Linear Light.
  8. The next step is to smooth the image.Click on the Low layer and use Lasso Tool to select the desired part(Feather between 18 and 20).
  9. Now go Filter >> Blur >> Gaussian Blur and adjust the amount you need.There you will get a nice smooth image.
  10. Finally save your image.
How to Use Frequency Separation in Photoshop

So, as mentioned above, you can easily smooth the image.You have to spend a lot of time for one image.It is one of the disadvantages of this method.Did you not understand the above steps? So, you can see the video below.


So you know about How to Use Frequency Separation in Photoshop, Hope you like the post, don’t forget to share it with your friends and leave a comment below if you are facing any problem at any step in the method discussed above.Thank you.

Tuesday, June 19, 2018

Free Online Tools Use for Photo Editing

Free Online Photo Editors
When you need to edit an image, photoshop will be opened for it.But sometimes it can be troublesome.Also, photoshop is a great software and requires more ram to run.For example, you are opening the Google Chrome Browser.A friend later sends you a picture.Imagine that you need to add a text.So what are you doing for this?

Actually, it's often done through photoshop.But google chrome is a web browser that uses a large ram.So with Photoshop open it will slow your computer.So you can use an online tool for photo editing.Your computer is not slow because it can be on your web browser.Also, using this online tool makes it easy to work on a windows computer and windowless computer.So, we've brought some online tools to help you edit such photo today.They can be used without sign up.


Blur a part of an image: Image Blur

Free Online Photo Editors

If you add an important file to internet, such as a credit card, vehicle or a roadside view, Some parts need to be blurred.To do this in Photoshop, open the desired photo, and select the partition from the Marquee Tool, and then select Filter> Pixelate> Mosaic from the menu item.Or use the Blur tool on the toolbar.But you do not have to open photoshop for this.When you visit imageblur.io, browse or drag the necessary photo and select its desired partition, and then click on the yellow blur button to blur that section.Then the photo will be re-downloaded through the Continue button.

Professional Screenshot Editing: Screly

Free Online Photo Editors

If you're sending a screenshot, It should be well visible.You need to edit it.When you introduce  products like software, websites, etc., it's best to put it in a professional, back-shadow, back-up color, and so on.So, to edit your screenshot, photoshop can be quite difficult to use.Instead, press the PrintScr key on the keyboard, enter the screely.com web page and paste the Ctrl + V shortcut to automate this.Then window decorations are added.This tool is still in its early stages and will include features such as changing GIF, editing photos.


Add text to a photo: Add Text, PicFont

Free Online Photo Editors

If you make meme, to add a name or website to your posting, If necessary, the addtext.com website makes it easy.Not just adding letters but also, After uploading the photo, add as many textbox as possible, allowing them to have different fonts, colors, sizes and placement.Because it contains many default fonts similar to Word Art, blending options like Photoshop do not have to be time consuming.When used free, the bottom right corner of the image will add a watermark  from the website.If you want to make a card with an image, picfont.com can do it.Because they have default designs, you do not have a problem without a photo.

Match the social media Setting up sizes: SIR Tool

Free Online Photo Editors

Adding photos to social media sites requires different sizes.There are different image size for facebook profile, cover, Twitter and Google+.When uploaded without proper processing, it does not automatically compile the partitions we need to show when it is set up automatically.But if you add a single photo to many social networks, it is difficult to make every image.In such cases, the Social Image Resizer Tool can be used.A large-sized photo uploads it and select the box next to Choose a size from the selection box to select the type of photo you need to crop.

For complex edits: LunaPic, Pixlr, Fotor

Free Online Photo Editors

If you want to create anything beyond the above basic photo editions, There are many websites that offer free services.LunaPic has many tools.To blur the photos, add Photoshop, as well as add various effects and even create animations using several photos.Pixlr is a well-known online photo editor.But Flash using was suspended in Web browsers because pixlr was coming to the low state.But, if your browser has enabled Flash, you can still work.The Fotor website is best suited for instantly adding stickers, text, frames, and photos to create a social networking site such as Instagram.In addition to this, it allows for volume changes, eye shadow, teeth, and make-up.


So you know about Online Tools Use for Photo Editing, Hope you like the post, don’t forget to share it with your friends and leave a comment below if you are facing any problem at any step in the method discussed above.Thank you.

Friday, May 25, 2018

How to Edit an Image Without Installing Adobe Photoshop

Online Photo Editor | Photopea
You know most of all using Adobe Photoshop for Graphic Design.Some people use only photoshop.So, we brought you an online tool today.You can use it as adobe photoshop.For you think that you are far off.But you need to create some design by photoshop.So you think you've found a computer.But if it's not installed photoshop,You will be embarrassed.So now you can use photoshop online.This is an online tool and you can see everything on the photoshop.So you can use photopea.com online photo editor.In short, you can use Photopea as a substitute for photoshop.

How to Edit an Image Without Installing Adobe Photoshop? - Online Photo Editor | Photopea


Photopea is an advanced image editor, which can work with both raster and vector graphics. You can use it for simple tasks, such as resizing images, as well as complex tasks, such as designing webpages, creating illustrations, processing photographs and more.It will be helpful for you to work very easily.And can be used for emergencies.So  you can access this from your smartphone.It's not as easy as the computer, but it can do your job.

How to Edit an Image Without Installing Adobe Photoshop? - Online Photo Editor | Photopea

Another feature of this site is that,If you have an earlier project, you can edit it.That is, even the PSD can be edited via this site.Go to the photopea.com site.


Also read: Photo Editor App for Photo Editing With Lot of Features

So you know about How to edit an image without installing Adobe Photoshop? - Online Photo Editor | Photopea, Hope you like the post, don’t forget to share it with your friends and leave a comment below if you are facing any problem at any step in the method discussed above.Thank you.

Thursday, April 12, 2018

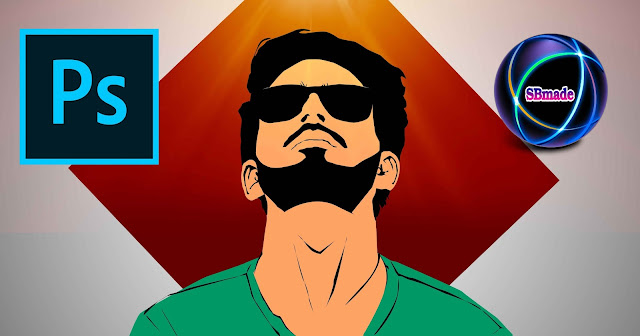
How to Make Your Face as a Logo in Photoshop Cartoon

We also brought a new Photoshop work today.This will surely be a new experience.Because you can turn your face into a cartoon.You can also create this within a short time.Such cartoons have already seen you.But it's important to use your image.And it's very valuable if you can do it yourself.So we will bring these tutorials to you.It can improve your skills.
How to Make Your Face as a Logo in Photoshop Cartoon
The picture above depicts what we are doing today.So, let's explain to you simply.We also use the image on the Internet to create this.If so, then we will explain how to create this.

1. First, open Photoshop and press CTRL + N to get a new page.

2. Next, open the image you want to design a cartoon.

3. Right click on the layer on that new image and select the rasterize layer.

4. Then click image layer and press Ctrl+U to set -100 saturation.Then you will see the image as black and white

5. Now get a new layer and select Pen Tool

6. Now you need to use the Pen Tool in the black areas of the image.You must use the Pen Tool for the face look.

7. Now select the right part and right-click it for fill the selected part.Fill those parts in black.Thus, you must use this Pen Tool for drawing face.

8. After you use the Pen Tool, You can put it in a design that you like and make it beautiful.

9. Finally make a good background design and save it.

However, we made this creation clear to you in a video.So it will not be hard for you.However, from the above steps, we were hoping to give you a brief idea.Because it's difficult to explain the way you do this through a article.So it is best to clarify through a video.If you watch the video,You will fully understand the above explanations.So check out the video below.
So now you know how to create this.We also used the Pen tool the most.Suppose now that you can create your own creation,So we always help you.Continue to keep in touch with our tutorial and grow your knowledge.
READ:


So you know about How to Make Your Face as a Logo in Photoshop Cartoon, don’t forget to share it with your friends and leave a comment below if you are facing any problem at any step in the method discussed above.Thank you.

Tuesday, March 13, 2018

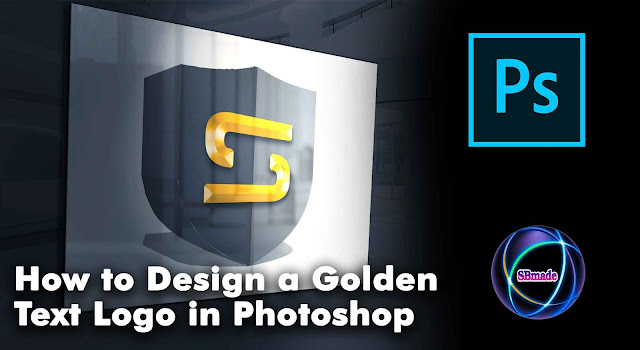
How to Design a Golden Text Logo in Photoshop

Logo Design is very important to you.Logo can be used for the integrity of something.Logo can be used for business.So today, we create a logo.By creating it, you can also take some experience.Because Logo design is a job.You have the ability to make money by doing it.However, you must acquire some skills before.You can also be a smart designer for Logo design.But everyone is not good at all.So let's create this logo for everybody's knowledge.
How to Design a Golden Text Logo in Photoshop
You must have an understanding before starting design this logo.It will be useful in the future.And so Logo Design improves your Photoshop usage.You will be able to create new ones.Share this design with your friends and enjoy yourself.
How to Design a Golden Text Logo in Photoshop
 Design a Golden Text Logo in Photoshop
Now you saw our design.So now it's necessary to create it.We will give it a step-by-step explanation.So let's look at How to Design a Golden Text Logo in Photoshop

1. First, open Photoshop and press CTRL + N to take new canvas.Then click create new or adjustment layer icon and choose Gradient.Then the setting should be as follows.
How to Design a Golden Text Logo in Photoshop
Gradient Background

2. Then drag and drop image for canvas.Now use the Rectangular Marquee Tool, Select a half of that image.Now use the paint bucket tool to paint the selected part(#333333).Make the remaining part black.It appears as follows.
How to Design a Golden Text Logo in Photoshop
Logo Coloring

3. Next, use the Horizontal Type Tool to type text.Then take it in the middle of the logo.Then right click on the text layer and select the blending option.Then use Bevel & Emboss and set up the text.Next Right click layer and choose Rasterize layer style.Next press Ctrl+U and change the text color.It appears as follows.
How to Design a Golden Text Logo in Photoshop
text editing.

4. Now Right click image layer and choose New 3D Extrusion from Selected Layer.It should be turned over to the left.Then move the text to the Logo.Also, press Ctrl and drag and drop the text.It appears as follows.
How to Design a Golden Text Logo in Photoshop
2D Logo Convert to 3D Logo

5. Now select Logo layer and Text layer.Then Press Ctrl+E for merge layer.Finally, press Ctrl+M and increase brightness.Then Press Ctrl+S and save Logo

If you are unclear in the above steps, check out the video below.
READ:


So you know about How to Design a Golden Text Logo in Photoshop, Hope you like the post, don’t forget to share it with your friends and leave a comment below if you are facing any problem at any step in the method discussed above.Thank you.

Monday, March 12, 2018

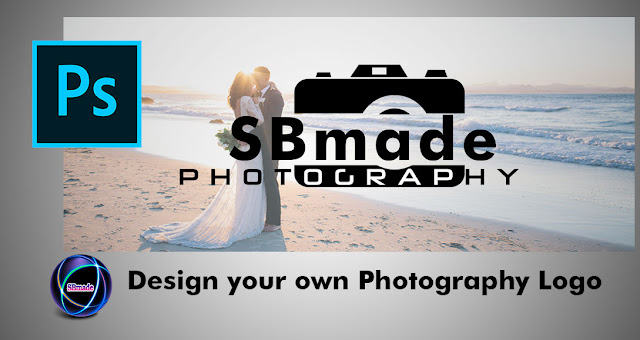
How to Design your own Photography Logo

How to Design your own Photography Logo

We have brought you something valuable today too.So that's a very pretty logo.And you can use it for your day-to-day work.For example, for a photographer, it's very important.Because a photographer always use his camera.And photo editing is one of the most important things for a photographer.So, you can create a logo for your own design identity.So today we teach how to design a Photography Logo.This Logo can be used for Studio and for a photographer.
You can use the desired name for the present logo.Because we have used the our site name for explain it to you.And we explain to you as a step by step.It is also important for you to have an initial understanding of the shape of this logo.So, the following is the Photography Logo.


How to Design your own Photography Logo

Now you have some idea about this design.We used Adobe Photoshop to create this.So, then, let's see how we can create this.

1. First, open Photoshop and press CTRL + N to take new canvas.Then drag the camera image to the canvas and drop it.Click the "Layer 1" and use move tool for change size
How to Design your own Photography Logo
drag the camera image to the canvas

2. Next, use the Horizontal Type Tool to type name.And use a matching font.Again take the Horizontal Type Tool, type as Photography.And use a matching font.Next using the move tool, adjust your word.
How to Design your own Photography Logo
Type Text and adjust

3. Now click the "Layer 1" and use the Rectangular Marquee Tool for selecting area.Then use delete key for remove selected area.It appears as follows.(use Ctrl+D for Deselect)
How to Design your own Photography Logo
selecting area and remove

4. Next we must merge all text layers.To do this, click the Ctrl key with text layer and press Ctrl + E.Then click on the merged layer and use the Ctrl + U to turn black.It appears as follows.
How to Design your own Photography Logo
merge text layers and convert black color

5. Now click the merged text layer and use the Rectangular Marquee Tool to select the bottom of the camera.Then press Ctrl + i to enter the white for text.
How to Design your own Photography Logo
Text whitening

6. Now you need to attach a wedding photo to the background.Drop it and drop it on canvas.Then move the layer to the bottom and apply opacity to about 40.
How to Design your own Photography Logo
add background

7. Now all right.Finally save your Photography Logo.

If you are unclear in the above steps, check out the video below.
READ:


So you know about How to Design your own Photography Logo. Hope you like the post, don’t forget to share it with your friends and leave a comment below if you are facing any problem at any step in the method discussed above.Thank you.

Sunday, February 25, 2018

Create Text Masking Effect image with Photoshop

Create Text Masking Effect image with Photoshop


Using the Adobe Photoshop software, various designs are made.And Photoshop has the ability to edit photos beautifully.But it's different to the user's creativity.As before, we published lot of photoshop tutorials.There are various designs in them.So today, we will give you a new way to create your own photo.This method can surprise your friends.So you may be someone who has some idea about this method.But many people do not know.So let's move these tutorials as a step further today.
It's important to be able to make sense of it before you create it.So at the end of this design, you can get a real photo.You can also use it anywhere.Also, below is the photo we hope to create today in the tutorial.Have a look at it first.
Create Text Masking Effect image with Photoshop
Text Masking Effect image with Photoshop
Now you know what was created today.Next, explain to you how to create it.If so, continue to stay with us and learn these things.Here we are teaching the way we have been designed.So let's see how to create a text Masking Effect image with Photoshop.


1. First, open the adobe photoshop and press CTRL + N.Next customize the new page and click OK.There will be a blank page.Its background is white and it is important for this design.Next, press CTRL + O to add image for photoshop.The following image was used for design.
Create Text Masking Effect image with Photoshop
Get new page and add image
2.Next in the layer tab,A layer called Background can be seen.Double click on that layer and OK.Now the other layer should be named "0".It's for our convenience.


3.The next step is to separate the man of the picture.Click the "0" layer and get the Quick selection tool.Next, select only the man body.Next you need to click the Refine Edge button and customize the selected part.Click on OK.
Create Text Masking Effect image with Photoshop
Select and Customize with Refine Edge
4.The next selection is displayed.Now you have to take a layer mask.Click on the layer mask icon.
Create Text Masking Effect image with Photoshop
Get layer mask
5.Then press CTRL + J to copy the "0" layer.Here we get a new layer "0 copy".Then drag the layer "0 copy" and drag it to the lowest layer.However, layers should be arranged in the following image.
Create Text Masking Effect image with Photoshop
Copy layer and drag to down
6.Then click the "0" layer and set the size with CTRL + T.Then click OK.Next we get the Vertical Type Tool and type BODY.Use the Move Tool and drag text to the image.Then click on the "0" layer mask and get the Brush Tool.Then brush on the words BODY.
Create Text Masking Effect image with Photoshop
Type text and use brush tool
7.Next with the CTRL, click on the Text layer.It will select the text BODY.Next go to the Select tab >> Modify >> Expand.Select the size and click OK.
Create Text Masking Effect image with Photoshop
Expand Text
8.Then the BODY text line is selected round.Next click on ALT + Backspace.Then, the BODY text rounds will be colored.Then press CTRL + D to deselect.
Create Text Masking Effect image with Photoshop
Colored Text Round
9.Now click "0" layer and press CTRL + J.Then move the layer to the top.Then right click on the same layer in the layer mask and select Delete layer mask.Where the layer mask will be removed.Then right click on the top "0 copy 2" layer and select Create Clipping Mask.Then you can see the image on the BODY word.
Create Text Masking Effect image with Photoshop
Complete Text Masking Effect
10.Next you can use the Horizontal Type Tool to add text.In the end, you can create an excellent photo.

However, if you do not understand the above, see the video below.

READ:


So you know about Create Text Masking Effect image with Photoshop, Hope you like the post, don’t forget to share it with your friends and leave a comment below if you are facing any problem at any step in the method discussed above.Thank you.

Tuesday, February 20, 2018

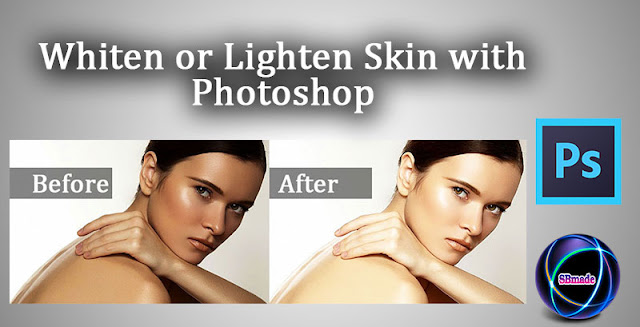
How to Whiten or Lighten Skin with Photoshop

Whiten or Lighten Skin with Photoshop
With Photoshop you can do a lot.So it can be used to give a light to someone's face.By doing so, you can do so naturally.With Photoshop you can remove the dark background of the face.You can remove the patch on the face.Therefore, anyone can easily Whiten and Lighten the face.In addition, not only the face, it can easily be whiten and lighten, even though the skin.This is capable of editing a subject in real terms.Today we work with photoshop.Let's see How to Whiten or Lighten Skin with Photoshop

It's important to have some idea before you do this.Therefore, we will show you the following image.You can easily Whiten or Lighten any figure in this way.
How to Whiten or Lighten Skin with Photoshop
Now you have some joy.So, Now you know what the result is now.So step by step, we explain the way you are doing this.So let's get started.

1. First, open up adobe photoshop.Then we will add the following photo to photoshop.
How to Whiten or Lighten Skin with Photoshop
open up adobe photoshop

2. The next step is to use the Quick selection tool.Then select the desired stock.We can also select more when selecting.For this, select the ALT button in the highlighted areas.Then we can select where necessary.
How to Whiten or Lighten Skin with Photoshop
Quick selection tool with selection

3. However, there may be minor shortcomings in the area choose.So click Refine Edge button to customize it.Then we need to click on most selected area to show in the following screenshot.Then click Ok.
How to Whiten or Lighten Skin with Photoshop
Using Refine Edge window for selection

4. Now we have an area selected correctly.Next, we need to move the selected part to another layer.For that, we need to press CTRL + J.Then we can see the selected portion with a new layer.Now, again, click on the new layer with the CTRL key.There again, we can see that the part has been selected.Then a layer mask should be added to the layer.See the image below.
How to Whiten or Lighten Skin with Photoshop
layer mask for new layer

5. Now we need to click the layer on the thumbnail and press CTRL + M.There we see the Curves window.Later it can be lightened.Then click OK.See the image below.
How to Whiten or Lighten Skin with Photoshop
Curves window for Lighten

6. Now we need to click on the Layer mask thumbnail.Then select the "screen".Then the skin is Whiten, Lighten and beautiful.
How to Whiten or Lighten Skin with Photoshop
Click Layer mask thumbnail and select screen

7.Finally, press "CTRL + S" and save.

Now everything is over.Now you know how easy it is to whiten and lighten skin.So many of these things can be done by photoshop.In addition, see the video below.You can see how to prepare a skin in a different way.

READ:
So you know about How to Whiten or Lighten Skin with Photoshop, Hope you like the post, don’t forget to share it with your friends and leave a comment below if you are facing any problem at any step in the method discussed above.Thank you.

Navigate» Become author for this Blog